I love twig letters. They emerged in the home decor space this last year, and I’ve loved them ever since I saw them in Better Homes and Gardens. But believe it or not, store-bought twig letters can come at a price. A very expensive price! Fortunately, there is an easy way to DIY it yourself. They are so easy to make and they add such a great element of rustic decor to any home. What’s even better is that you can actually make your own twig letters with stuff that you already have at home. Whether it be for a living room or for a nursery, use these tips and tricks to make the most beautiful twig letters. This will be the most inexpensive DIY project that you ever take on. Let’s get started below.
Here’s What You’ll Need For Your Own DIY Twig Letters
-A large wooden letter (usually found online at Michaels!)
-Twigs (all cut to various different sizes)
-Hot glue
-Berries or other pieces of decor (optional)
-Pruning tool (used to cut the twigs to their desired size)

Step One
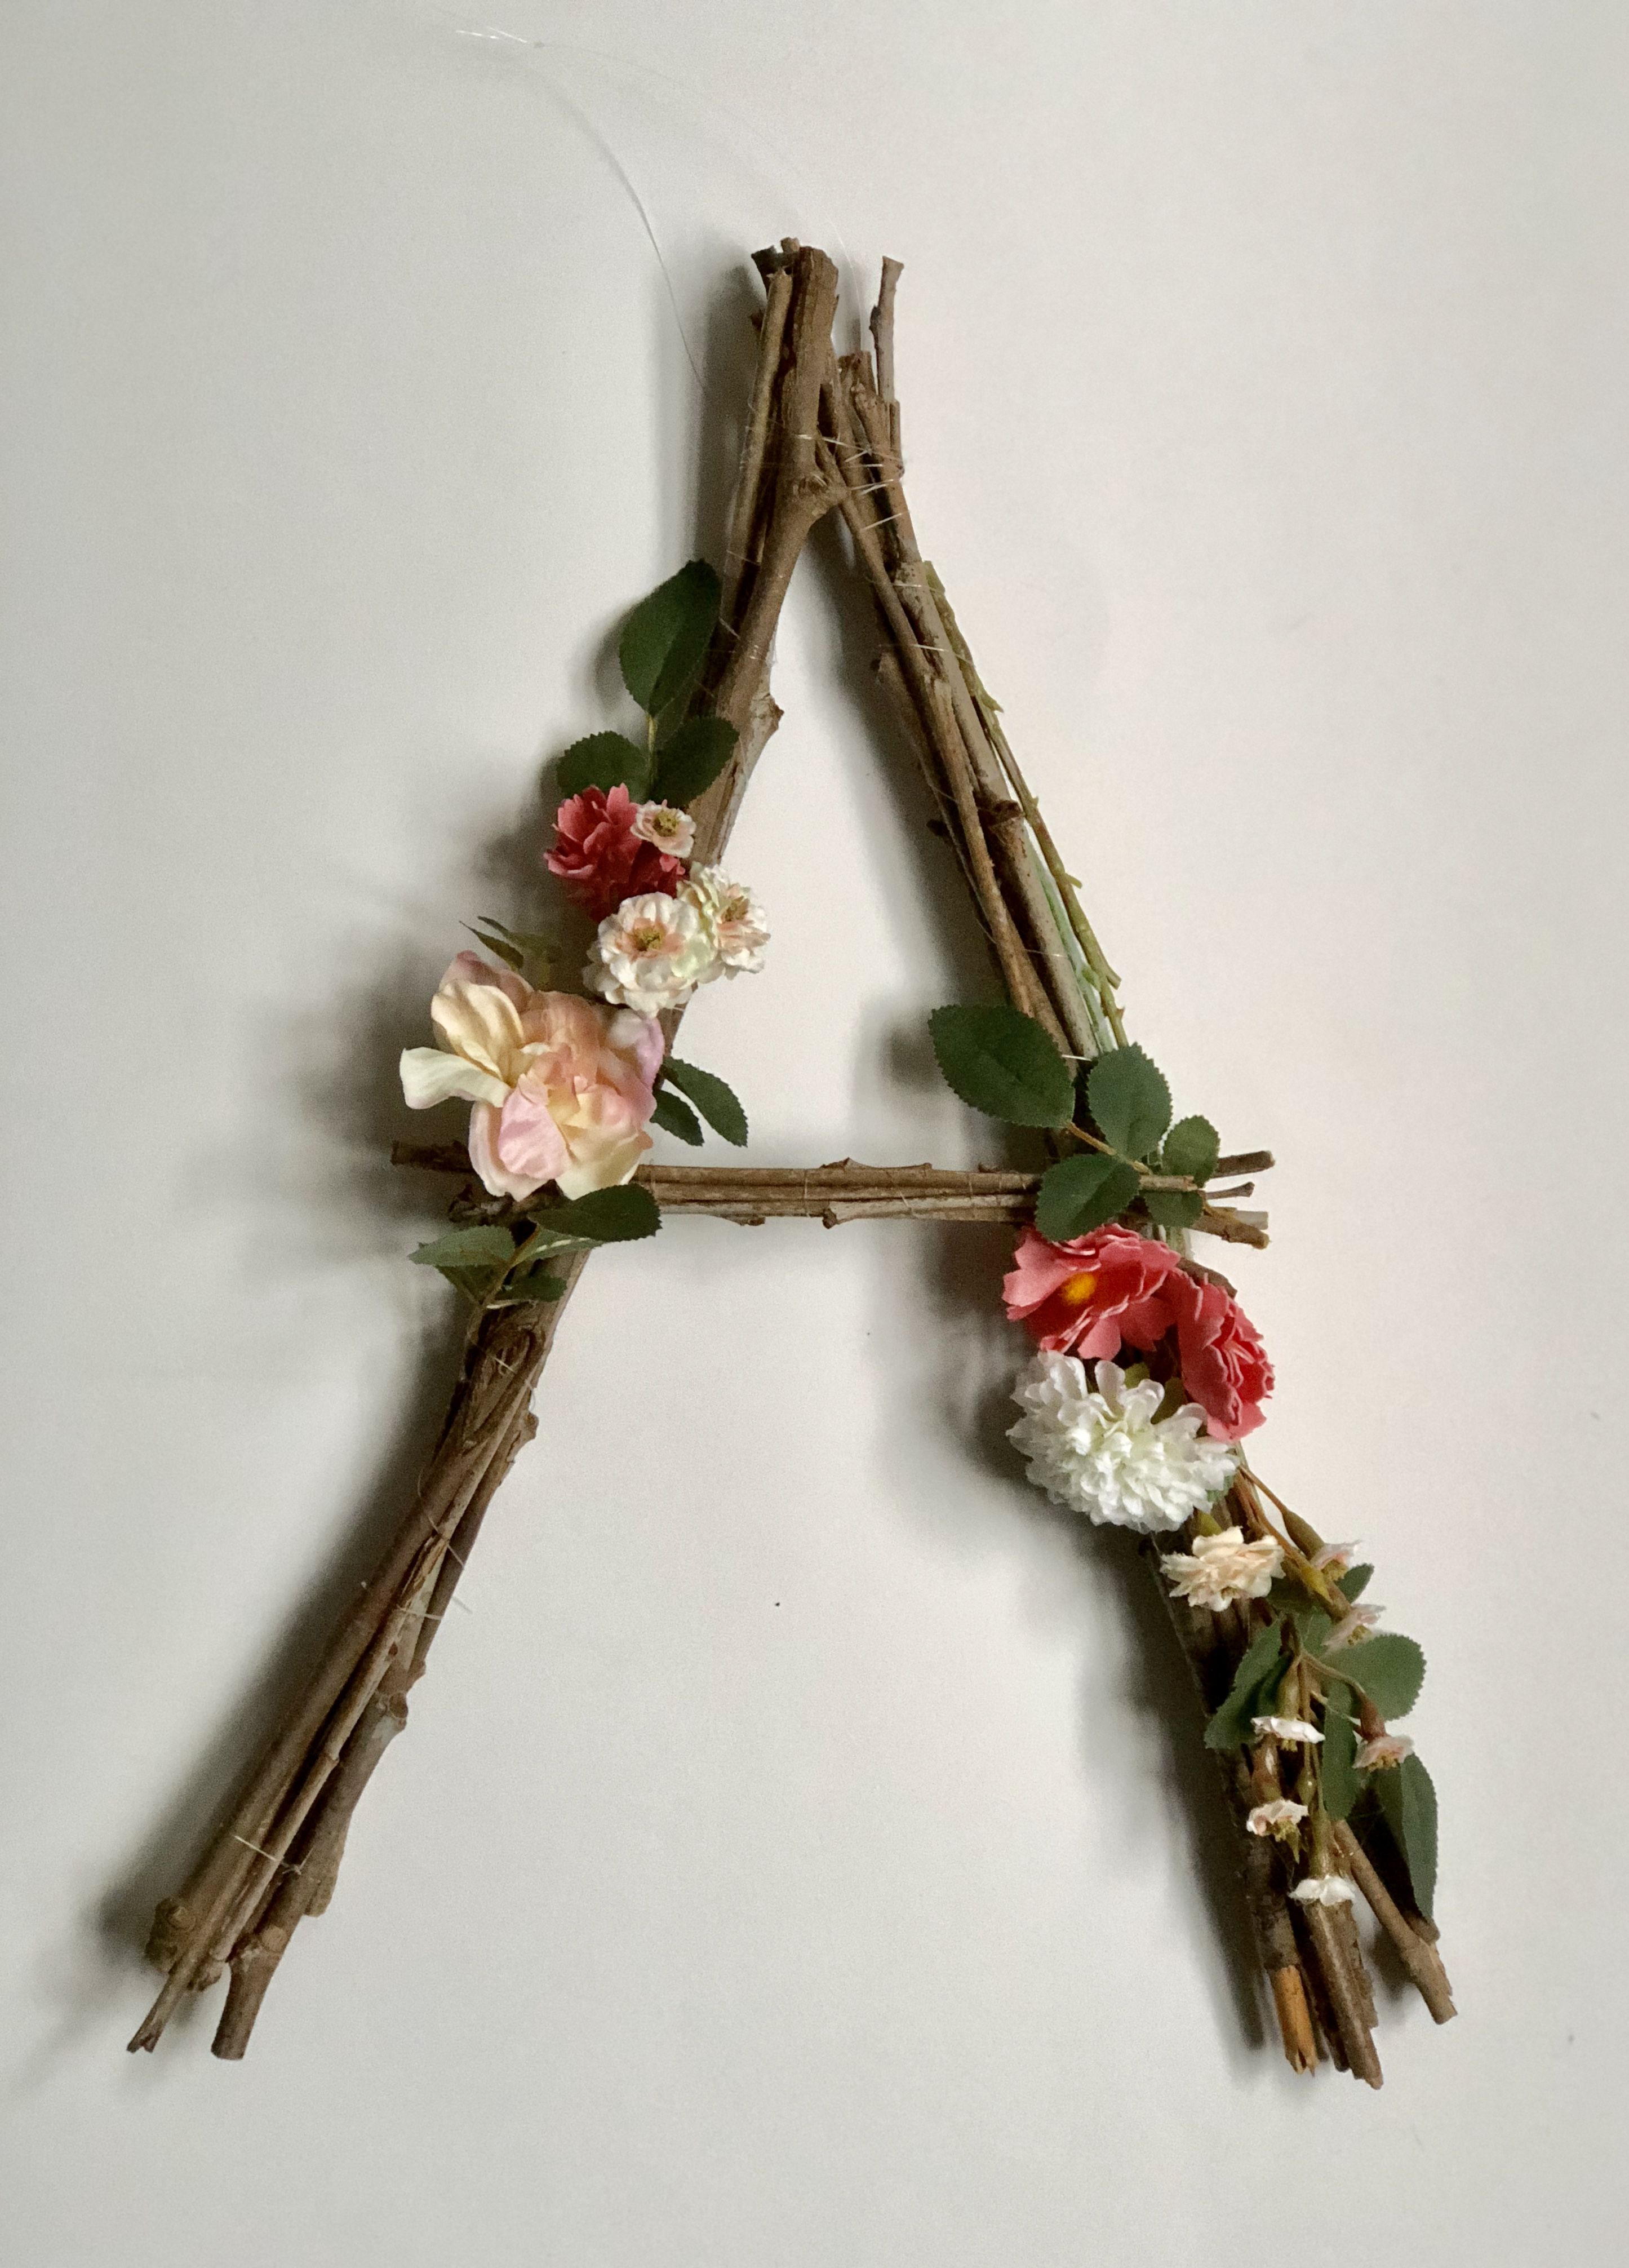
Use the wooden letter as a kind of stencil. Cut your twigs to various different lengths and hot glue them to the wooden lettering. I recommend holding each twig in place for a few minutes while the hot glue completely dries.
Step Two
Repeat the hot gluing process until the entirety of the wooden letter has been covered with twigs. Make sure that you use enough hot glue each time you go to attach a twig. A hearty dollop is just the right amount, just make sure that it isn’t noticeable when viewed from the finished side.

Image from YouTube
Step Three
Now that you have completely covered the surface of the wooden letter with twigs, you can add your favorite decorative elements. Use a thick ribbon to hang the letter in your home, and add some greenery for a really artistic touch. So simple, right?
Where To Hang Your Twig Letters
As I mentioned earlier, there are many different places in your home that would look great with twig lettering! I love the idea of using twig letters in a nursery to display a new baby’s name. Pick smaller wooden letters and use the tutorial above to spell out your baby’s name in an incredibly gender-neutral way. It would seriously look adorable in any nursery!
Pick up a larger size of wooden letter that is the same as your last name, and put it in your living room. This makes for a wonderful piece of wall decor. It’s even better because you made it yourself!
Alternatively, you could display your wooden letter as a wreath on your front door. It’s just up to you and the size of the letter that you create. However, if you do decide to display your letter outdoors, I recommend that you spray the letter with a clear coat of spray paint to protect it from the elements.
Images from Pinterest