
Patching drywall sounds intimidating. But it totally isn’t! If you’ve got a hole in your wall there’s no reason to hire a professional or even call a neighbor. You can easily repair it all by yourself. With a little time, patience, and an eye for detail, you’ll have a wall that looks completely perfect. I’ve put together some instructions to help you out–good luck patching!
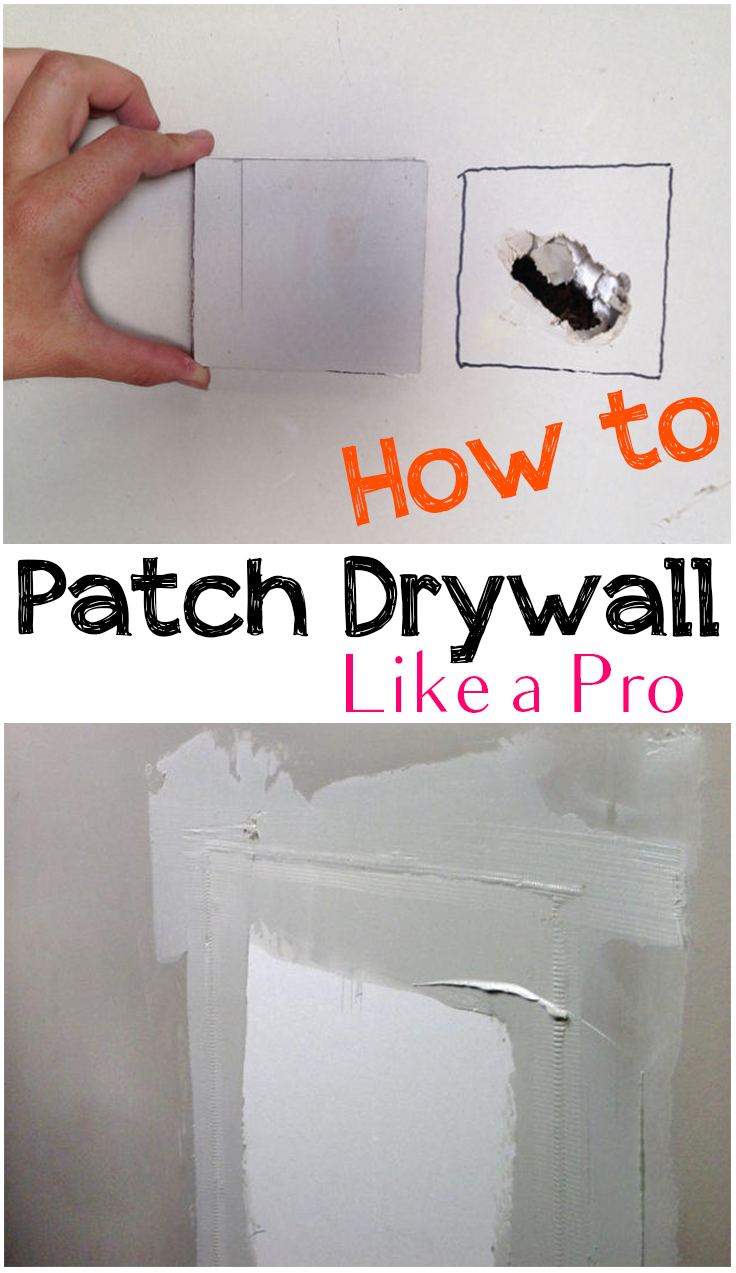
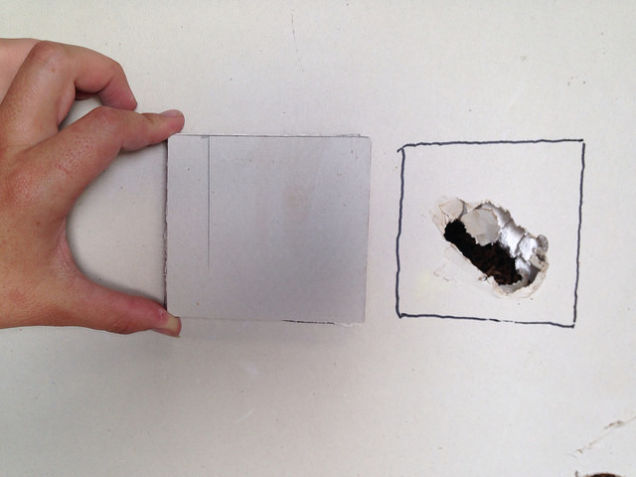
1. Cut out a piece of drywall that will cover the hole in the wall. It’s usually best to cut out a square. This will be your patch. Image via Sawdust Girl.
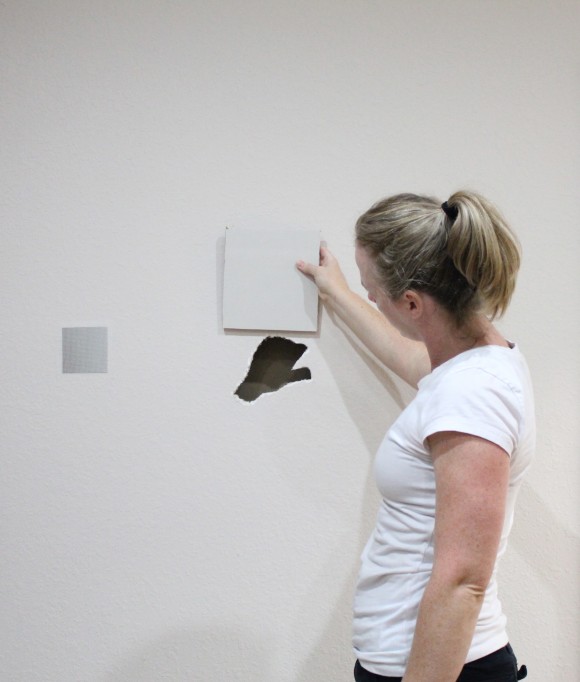
2. Then you need to cut the hole to fit the patch. It’s easiest to do this if you trace the square patch onto the hole with pencil, and then cut the outline with a drywall saw. Image via Life Hacker.
3. If you didn’t expose a stud in the wall with the hole, then you’ll need to attach a piece of wood to the drywall. Just put a small piece of wood through the hole and attach it to the remaining drywall. You’ll want to do this on both sides of the hole. Image via Sawdust Girl.
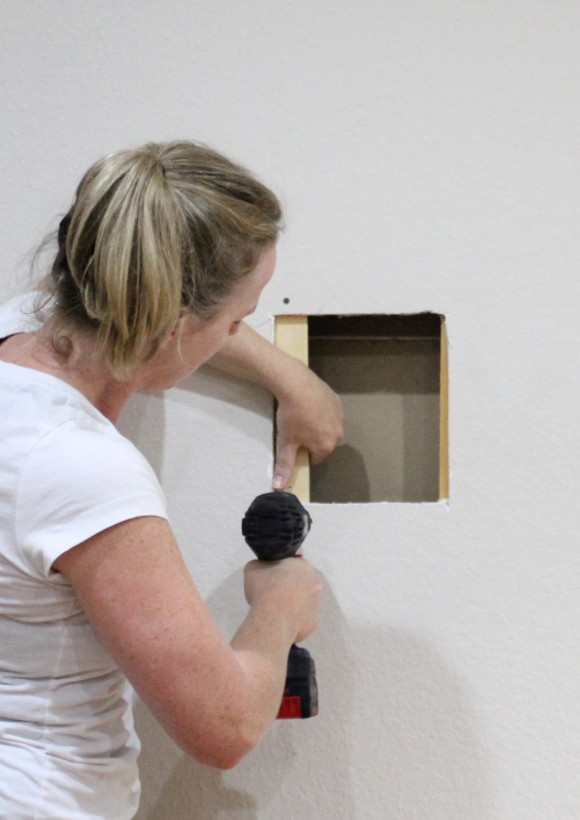
4. Now that you have something to attach the patch to, attach it! It’s best to use screws. So just place screws in each of the four corners. Make sure the drywall is very secure. Image via This Old House.

5. Now the gaps between the wall and the patch need to be filled in. You’ll want to use fiberglass mesh. This stuff will stick by itself so just cut as much as you need and cover the seams of the patch. Image via DIY Network.
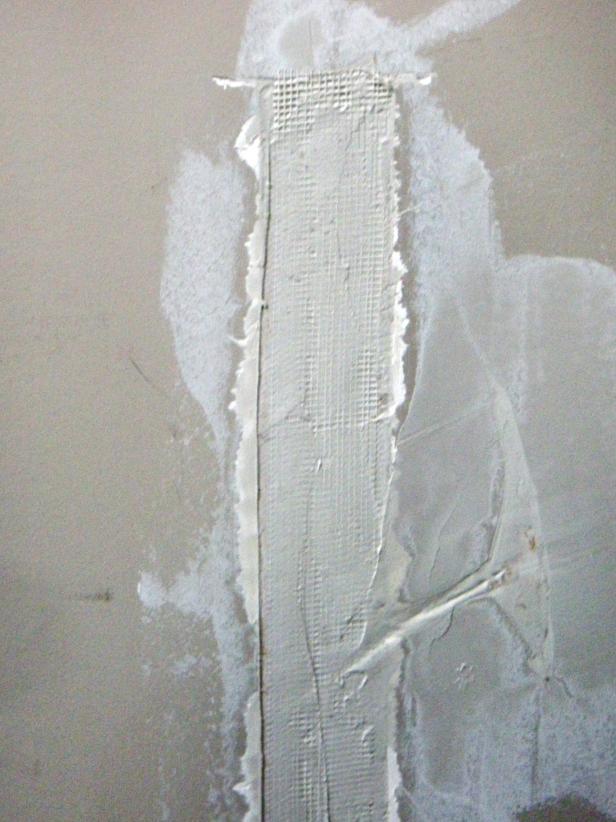
6. Now you’ll want to apply several layers of joint compound. Let each layer dry before applying the next layer. You’ll need about three layers. The goal now is to make the wall level and the patch and seams invisible. Image via DIY Network.
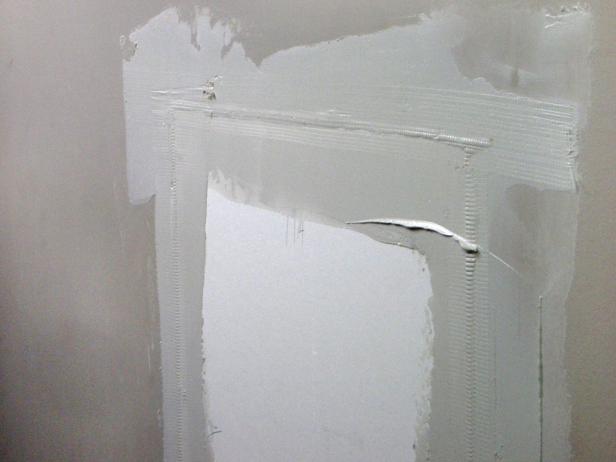
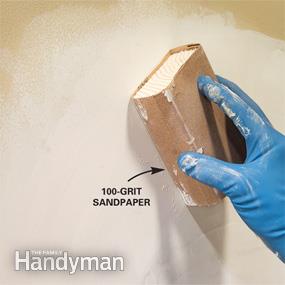
7. When you’ve built up the layers enough, you can sand them down so that the wall and patch are perfectly level. Make sure you haven’t left any globs, streaks, or cracks in the wall. If you do want texture, you can use a spray on texture to match the walls. Image via Family Handyman.
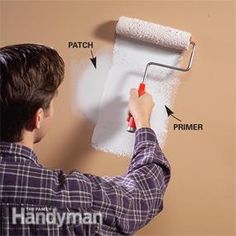
8. Finally you need to prime and then paint the walls. Once the paint has dried, you’re done! Enjoy your perfect walls! Image via The Family Handyman.

Hi, just wanted to tell you, I enjoyed this post. It was inspiring.Keep on posting!
I enjoy the efforts you have put in this, thanks for all the great posts.
Thanks very interesting blog!
I really like how you said that its really easy to repair your own dry wall hole. I had no idea that you just cut a small replacement for it. My little kids are always putting up holes on my wall. Thanks for sharing because I have quite a few to repair.
This is really helpful, especially for a tiny little repair that needs to be concealed. Thanks for sharing.
Do you have any video of that? I’d like to find out more details.
Unfortunately I don’t have a video, but I’m sure there are lots out there!
Thanks for this post. I just fixed the drywall from my bedroom. Looks so nice now.
I will try to send you a picture although is not finished jet.
I can’t wait to see it! 🙂